Page 1 of 1
Edge connector woes
Posted: 18 Apr 2021 11:00
by Lardo Boffin
I have recently acquired a 512 and a Rememorizer but am struggling with the Rememorizer a bit.
When I plug it in it has to be in a VERY exact position to work - only plugged in about 1/3 of the way. Unless in this position it either gets no lights on the board at boot or just two reds that don’t change.
I’m pretty sure this is down to the edge connector - I had similar before with various Sinclair computers (mainly +3s) when trying to plug in a DIVMMCfuture. On these it only worked when in a very specific position.
I have cleaned the edge connector with IPA and then a fibre glass pencil so in theory it should be ok.
In the end I fixed the Spectrum issue with a good quality edge connector extender.
Any suggestions for a 512? Am I being too gentle with my cleaning so it is still not making a contact?
Thanks!
Re: Edge connector woes
Posted: 18 Apr 2021 11:19
by Lardo Boffin
Quick sketch:
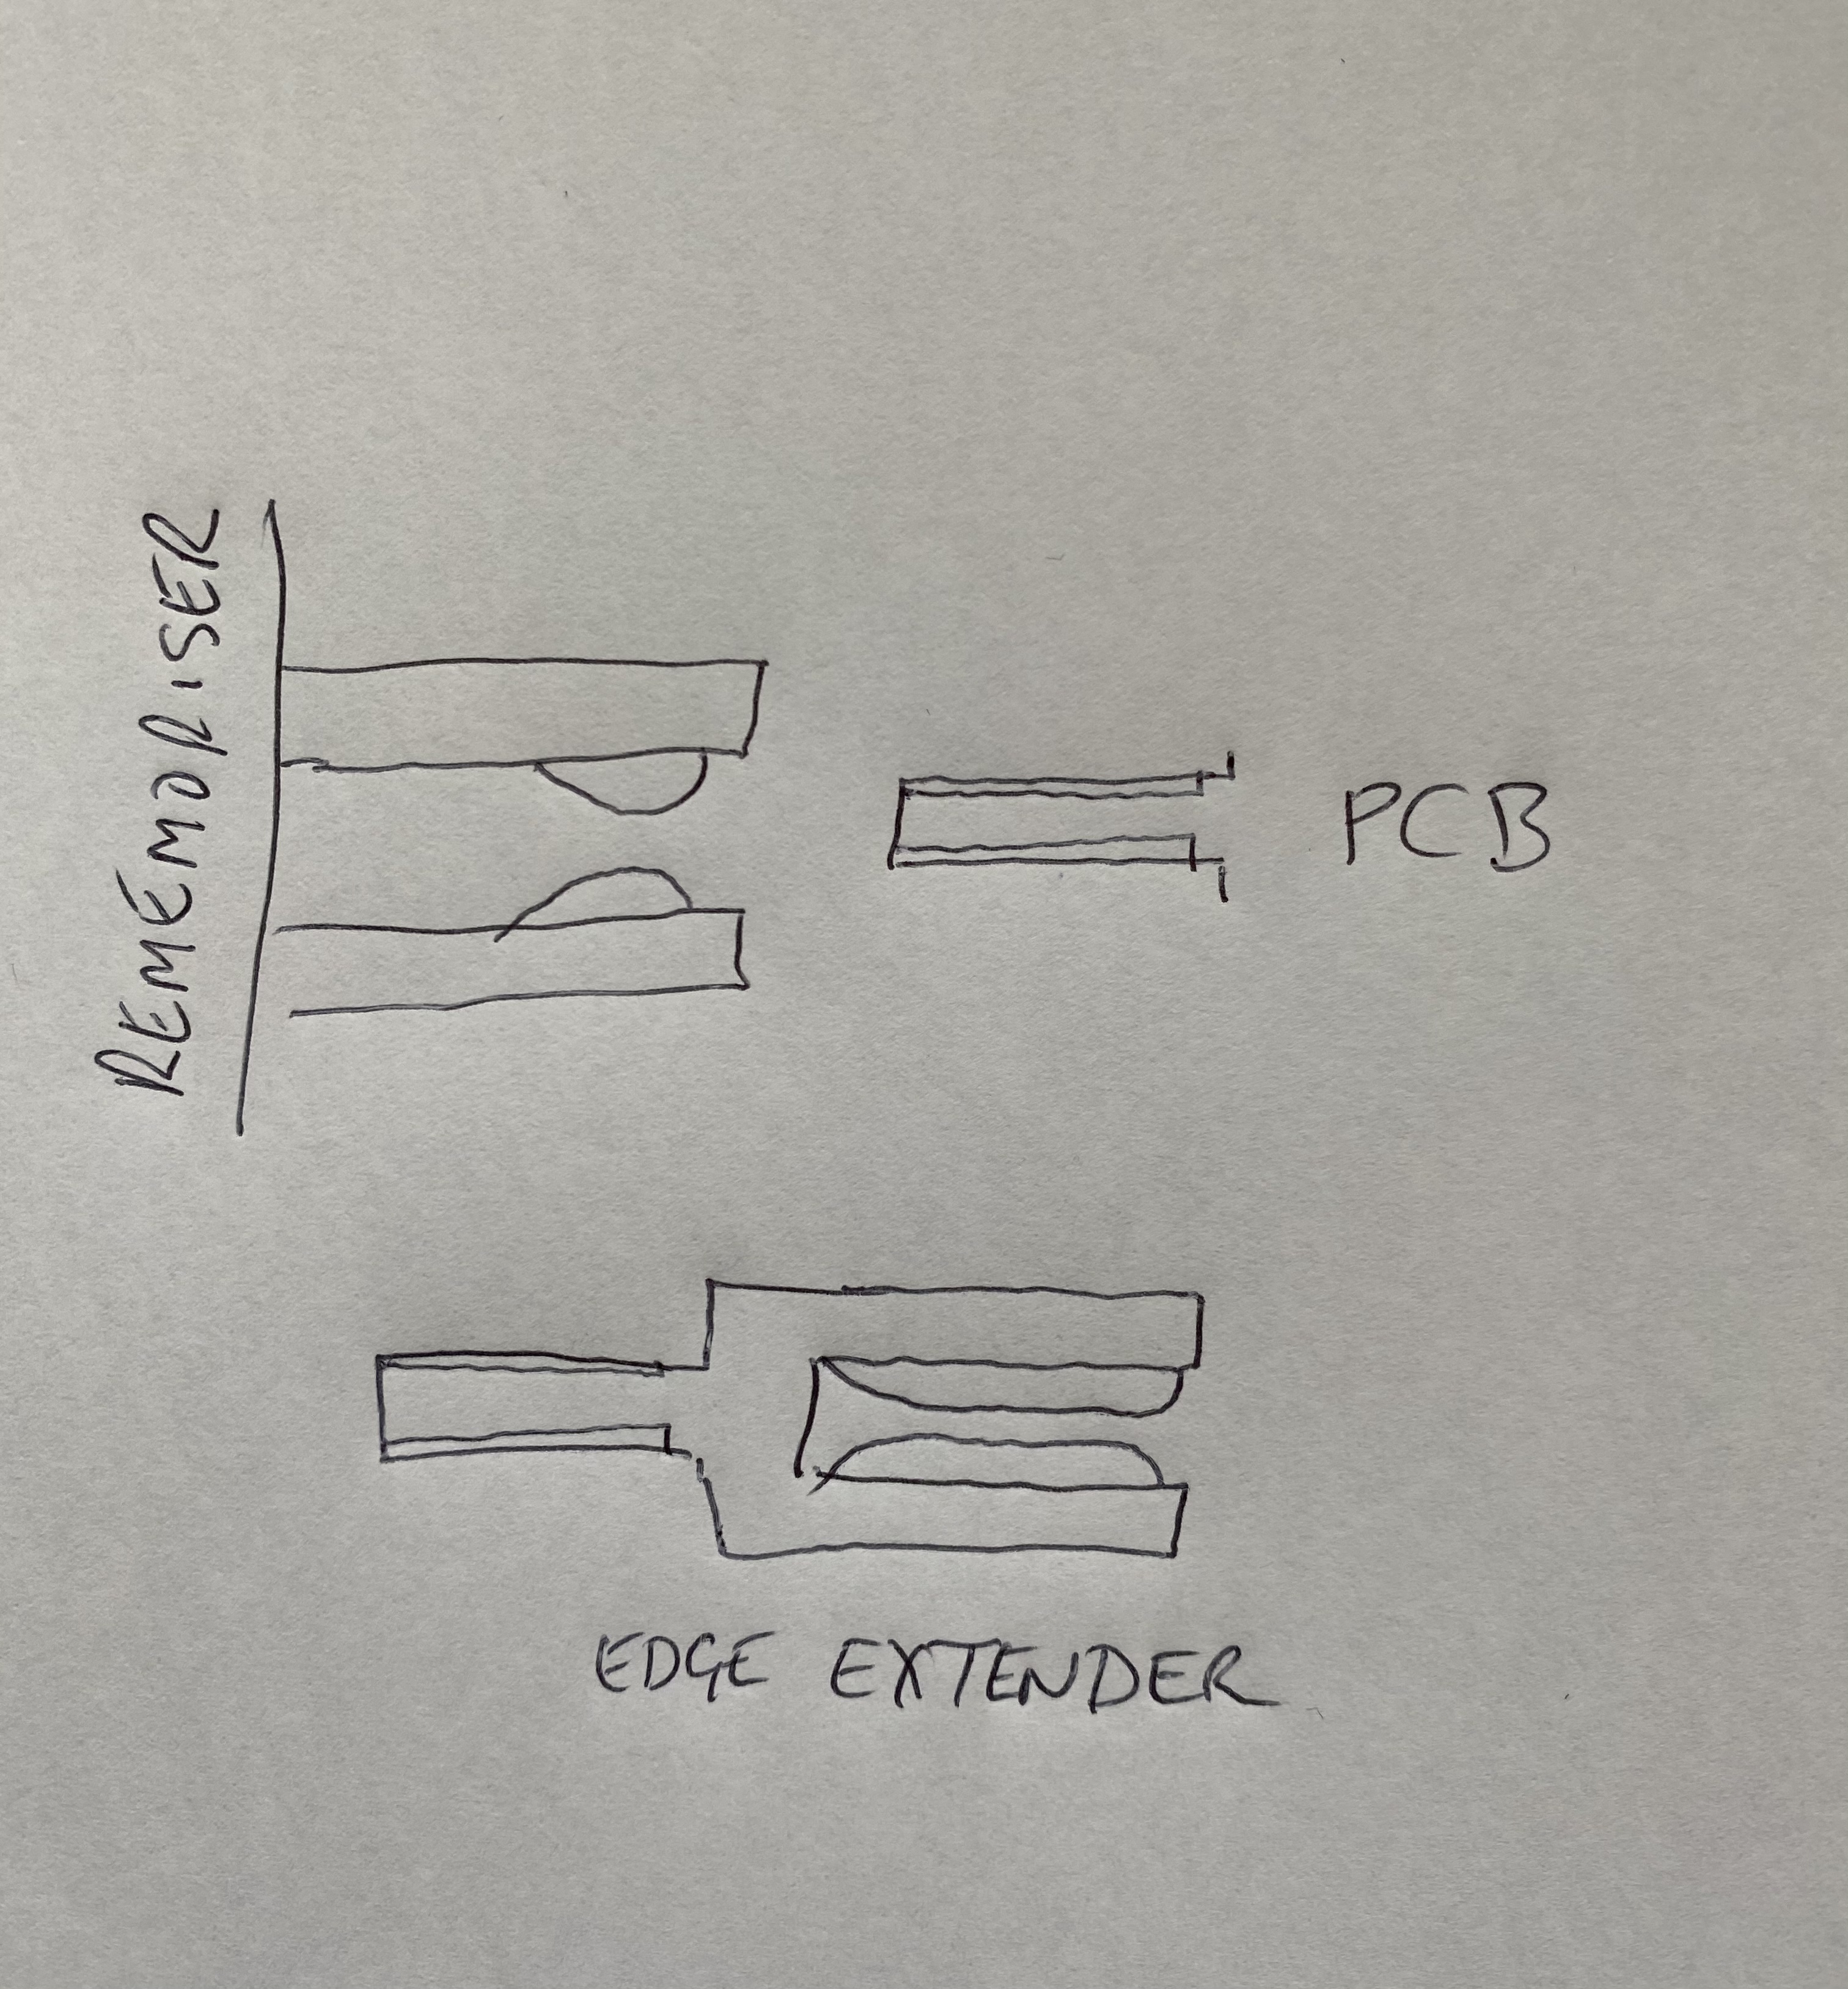
- A6E392A6-AB5D-49EF-97E1-930A2EEA1570.jpeg (2.35 MiB) Viewed 6797 times
The Rememorizer has a relatively small connection footprint looking inside it but the edge connector extender that I got for my Spectrum has a much larger connection footprint.
Re: Edge connector woes
Posted: 18 Apr 2021 11:41
by Dave
If you have used IPA and a fibre glass pencil, I don’t think you should be any harder on the edge connector. The edge connector on the MTX isn’t very good at all. Memotech used a very cheap construction method, they are not quality connectors and were formed with a layer of solder on the PCB traces. If you look closely at the “fingers”, you will probably find them scored and pitted from fitting & removing expansion boards. (The connector wasn’t meant to have frequent connection/disconnection cycles.)
You could check that all of the terminals on the REMEMORizer plug are OK, I.e., that they all sit at the same level and have not been bent up into the housing.
If they look OK, then all I can suggest is that you try to add more tinning to the worst of the edge connector fingers - applying a VERY thin layer of solder might help. Don’t add loads of extra solder, reflowing what’s there and just adding a tiny touch more will likely be enough.
Re: Edge connector woes
Posted: 18 Apr 2021 12:45
by Lardo Boffin
Thanks Dave. Looks like precision work which is not really my forte! However I do have some reading glasses on order so that should help a little.
I might see if I can get someone to make up an extender first though. Unfortunately given my lack of desk space I have to share fun computers with my work computer and hence can’t leave the 512 and Rememorizer on the desk plugged in - its just too wide!
Re: Edge connector woes
Posted: 18 Apr 2021 14:21
by stephen_usher
The technique to refresh edge connectors on other machines is to put on lots of flux and then a reasonable amount of solder on each finger and make sure that the new solder covers the whole thing, then use desoldering braid to suck off the excess solder, pulling the braid with soldering iron on top along the finger and off the board.
I used this technique to get the edge connector on an Amstrad CPC to work. The machine had been in a very damp environment and all the solder on top of the copper traces had oxidised and wasn't conductive.
Re: Edge connector woes
Posted: 18 Apr 2021 16:39
by 1024MAK
stephen_usher wrote: ↑18 Apr 2021 14:21
The technique to refresh edge connectors on other machines is to put on lots of flux and then a reasonable amount of solder on each finger and make sure that the new solder covers the whole thing, then use desoldering braid to suck off the excess solder, pulling the braid with soldering iron on top along the finger and off the board.
I used this technique to get the edge connector on an Amstrad CPC to work. The machine had been in a very damp environment and all the solder on top of the copper traces had oxidised and wasn't conductive.
Yeah, if the existing surface/solder is in poor condition, I would use lots of liquid flux and a desolder braid to clean the old solder off first. You may also have to use some new solder to aid the heat transfer from the iron.
Then apply a little bit of new solder to each finger, again using flux and smoothing the surface using desoldering wick/desoldering braid.
As long as the copper tracks that form the fingers under the solder are intact, this normally works wonders.
As is always the case with soldering, keep the tip (chisel type) clean and tinned, and only work each contact finger for less than 15 to 20 seconds at time. Then work on one at least three centimetres away so that you don’t stress the adhesive that binds the copper tracks to the board too much.
Why don’t you post a photo of the edge-connector so we can have a look?
Mark
Re: Edge connector woes
Posted: 18 Apr 2021 22:10
by Lardo Boffin
This is the top of the connector:
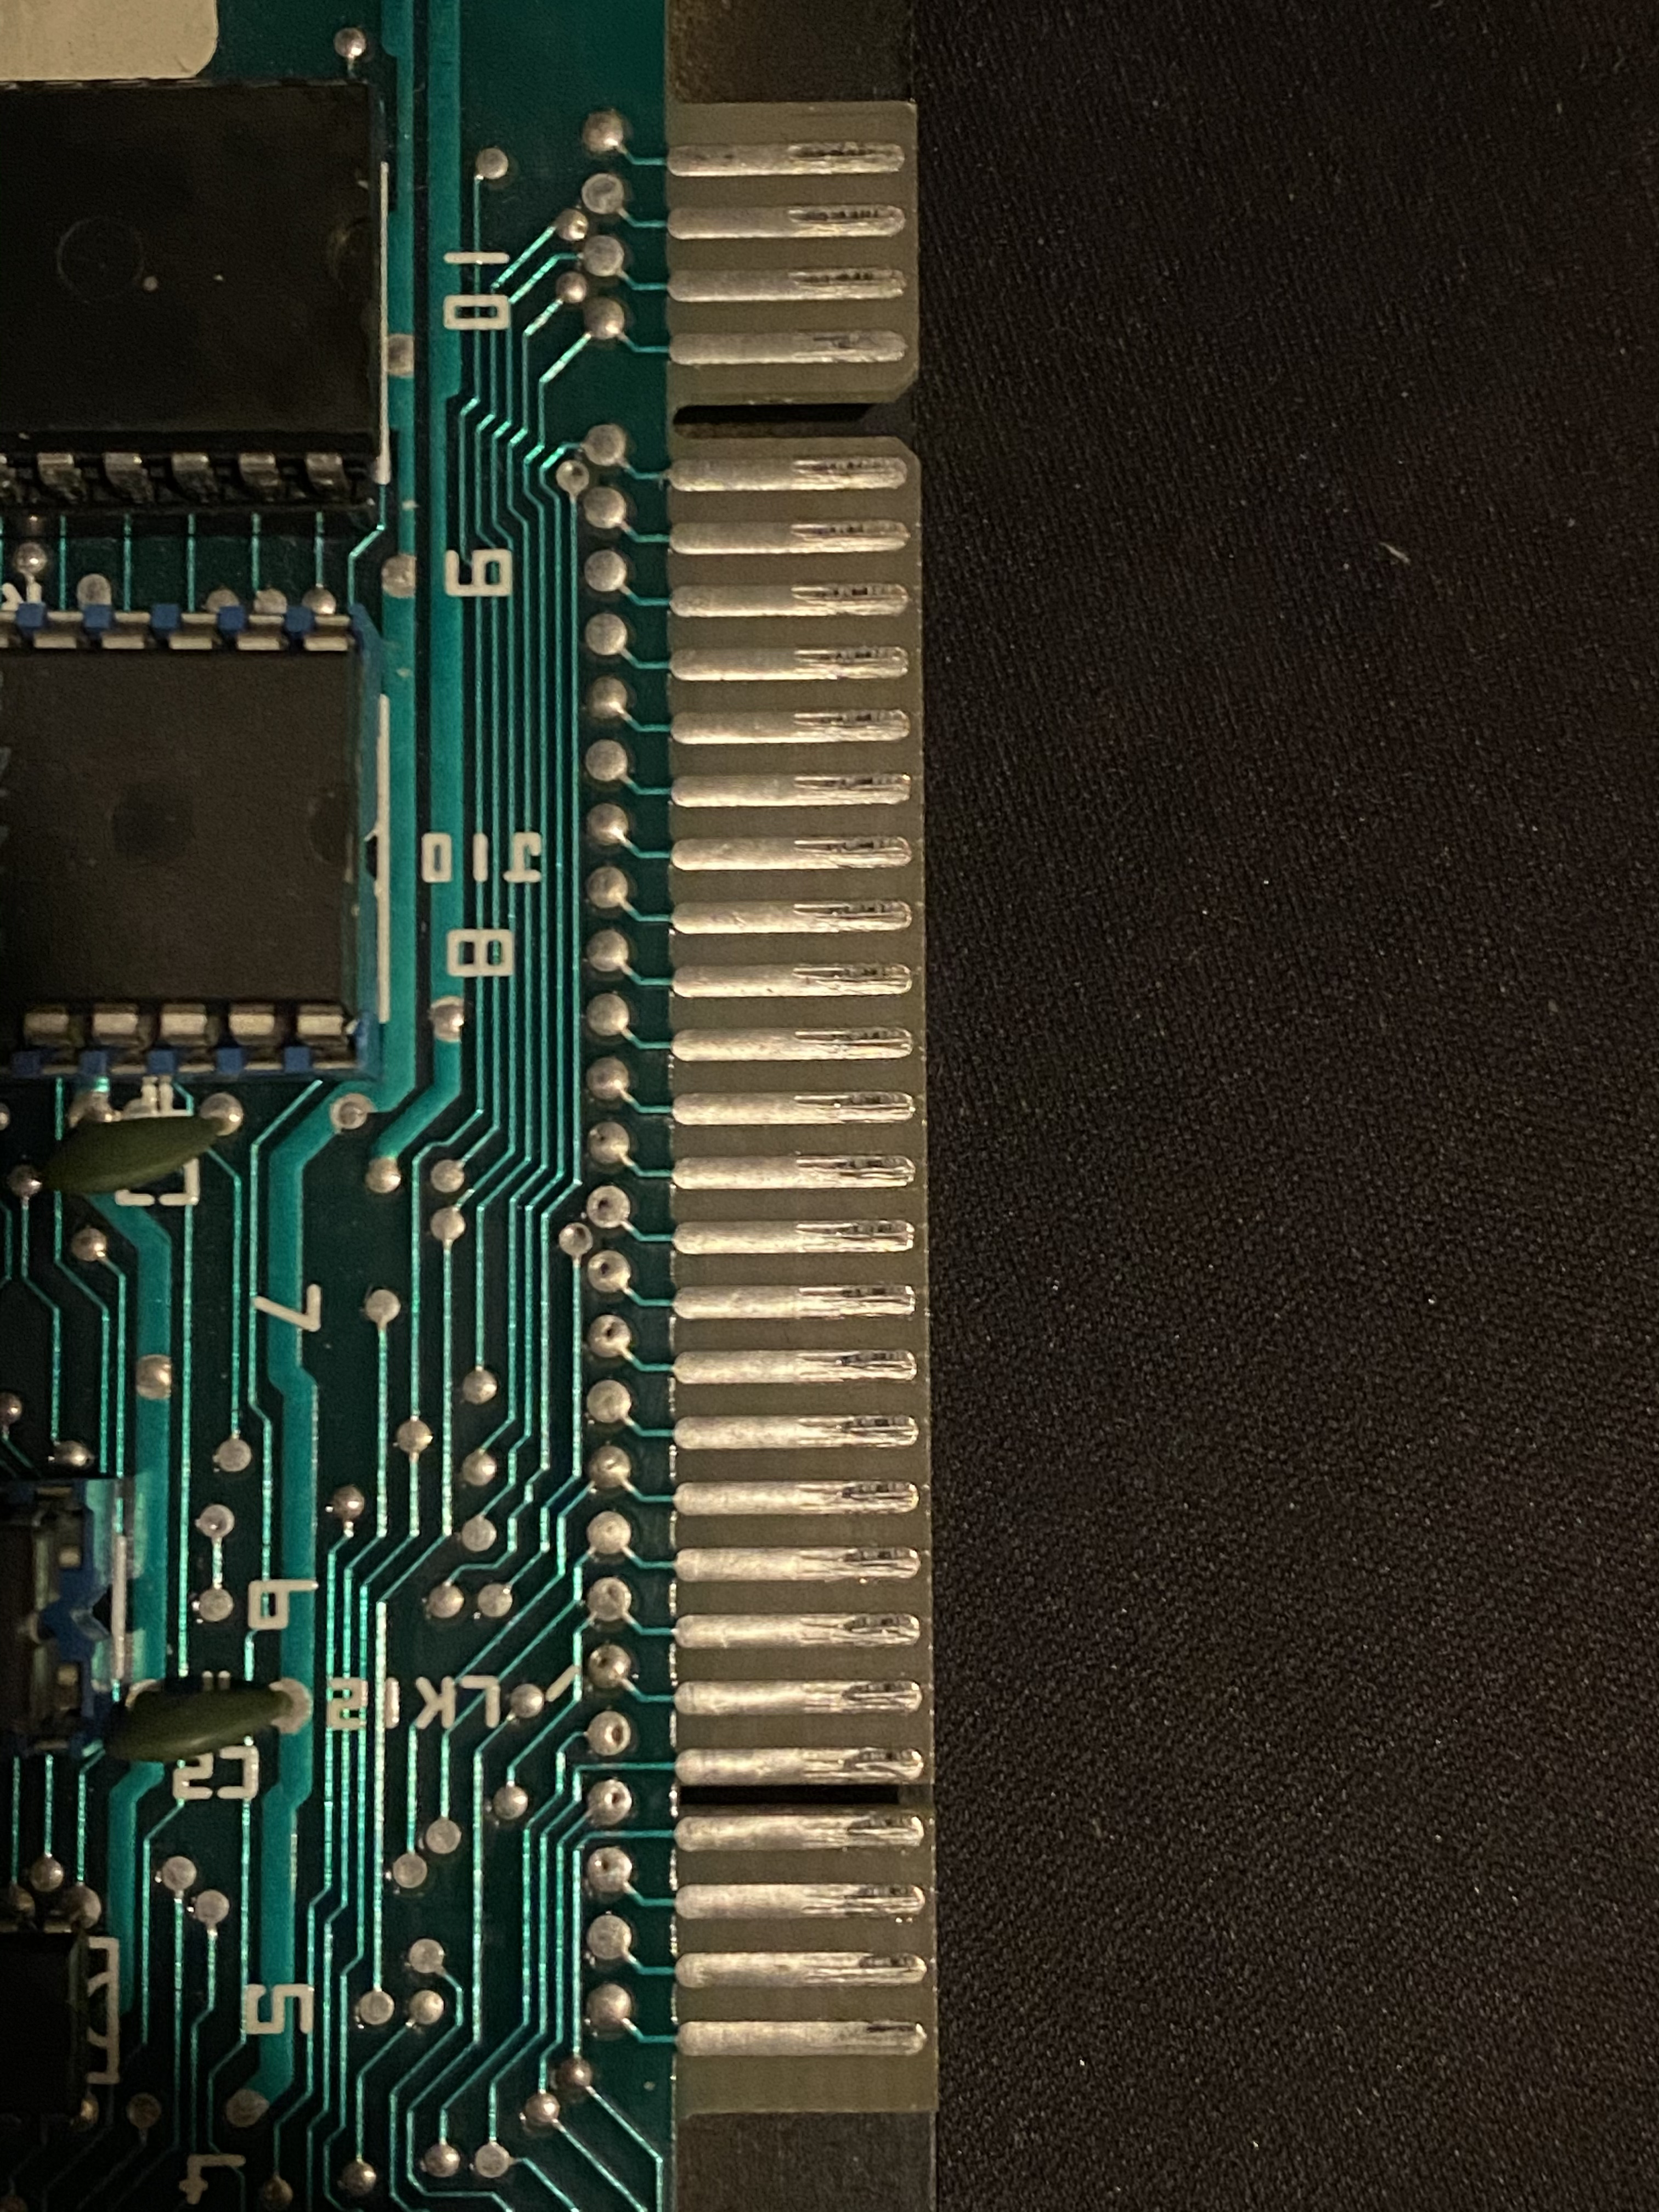
- A6B0780A-5BE9-4EF3-88EB-96F8C80619AC.jpeg (3.09 MiB) Viewed 6765 times
And a zoom in:
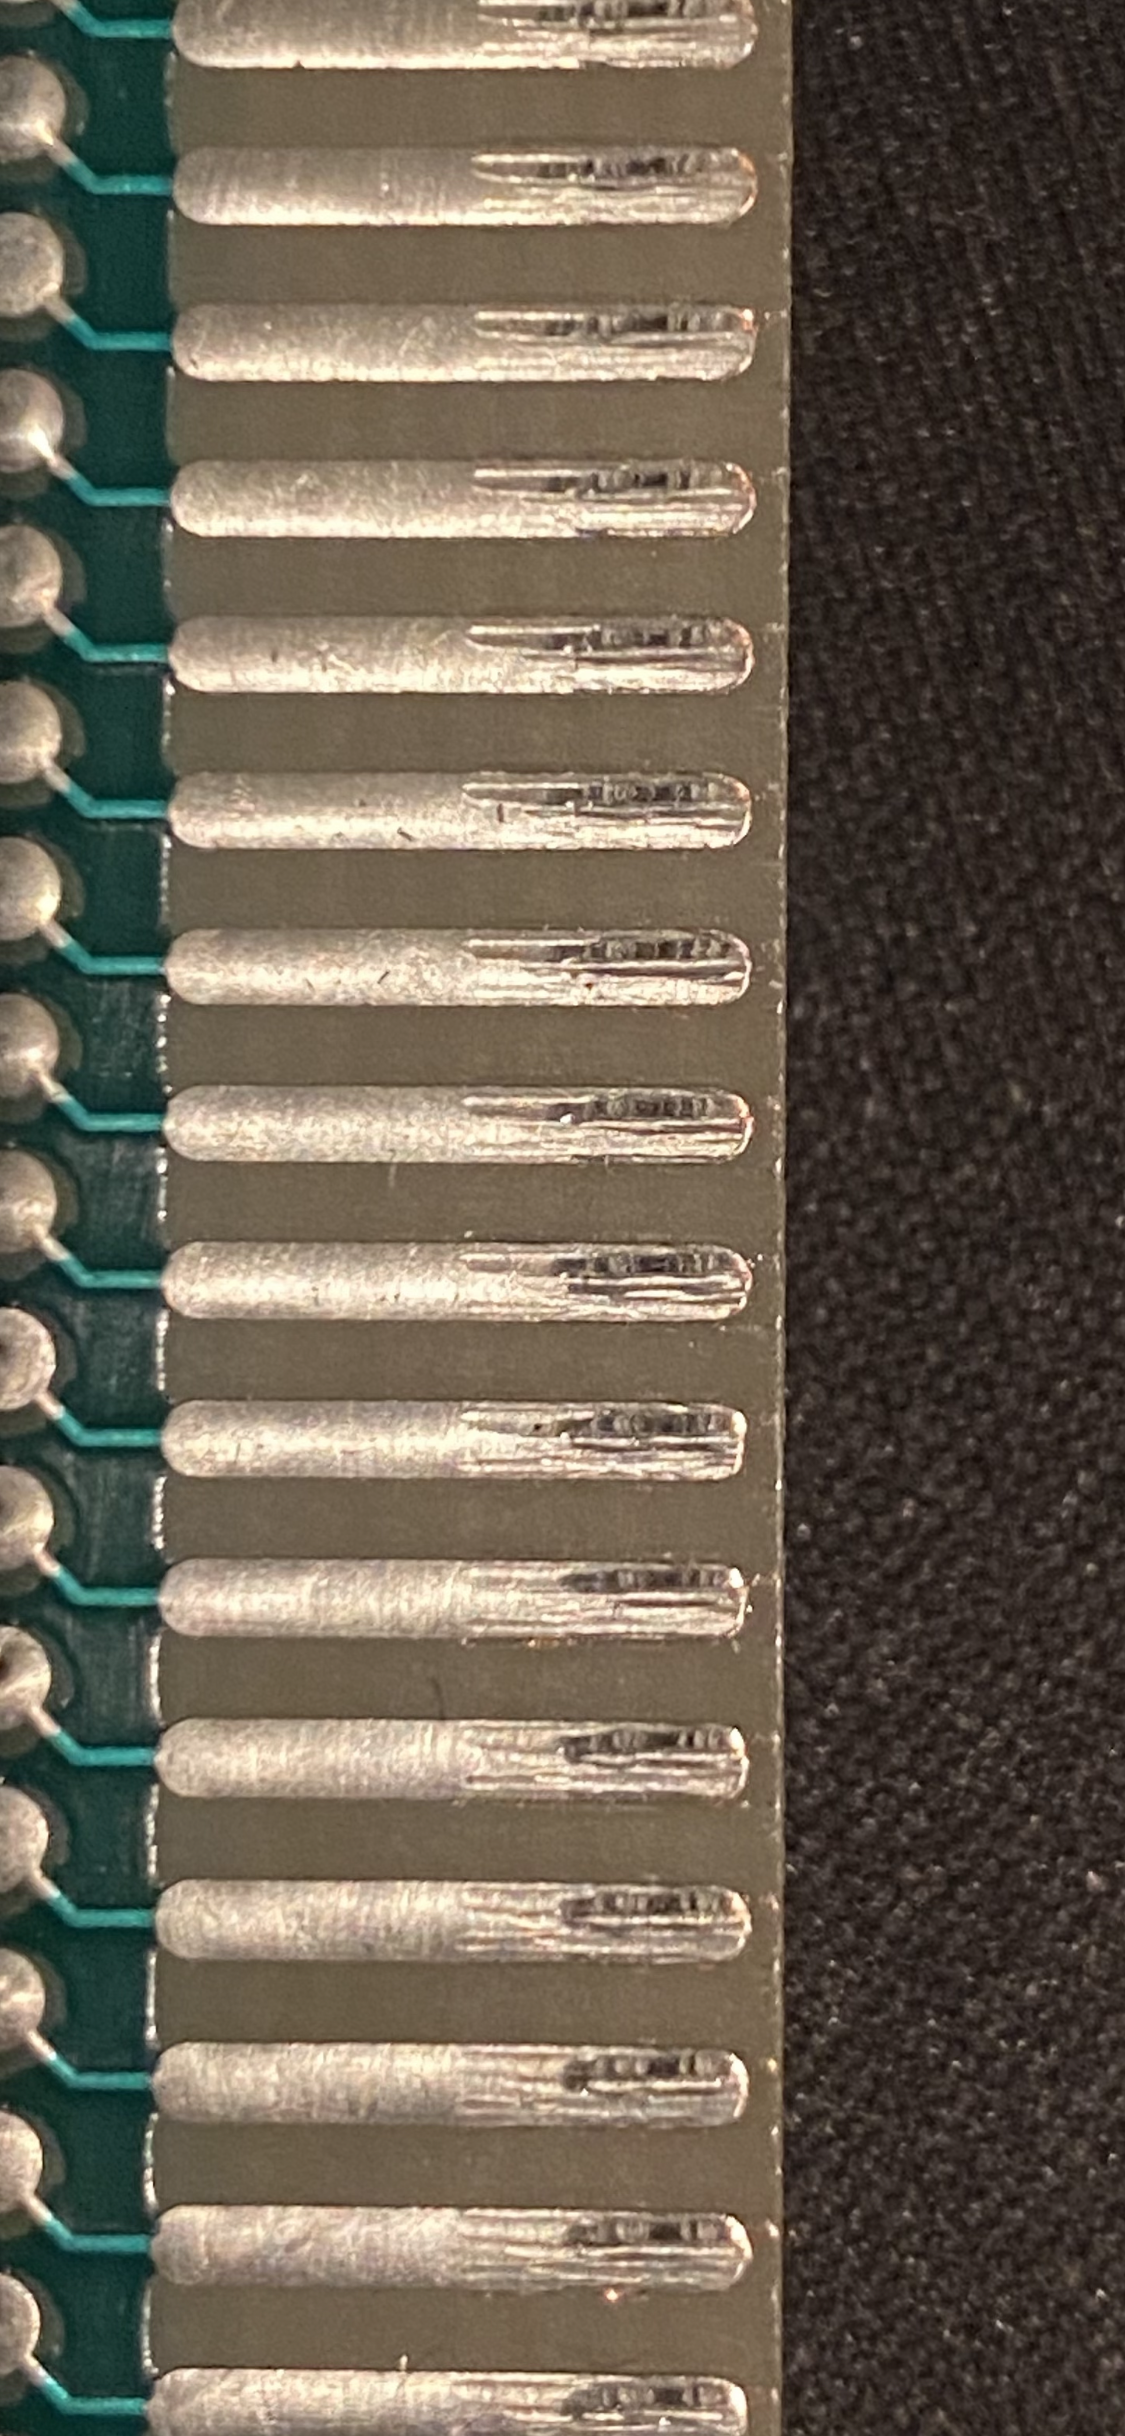
- ABBEF151-5A6F-433E-87D1-E64F8E383F8A.png (10.43 MiB) Viewed 6765 times
Re: Edge connector woes
Posted: 18 Apr 2021 22:12
by Lardo Boffin
With a magnifying glass and bright light I can see copper in places.
Re: Edge connector woes
Posted: 19 Apr 2021 19:28
by 1024MAK
That does not look too bad. A bit of desoldering and some new solder and it will be like new.
Mark